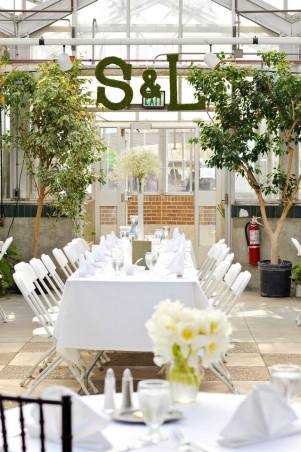

When attending a friend’s wedding I loved the moss monograms that she had placed at her sweetheart table. I was shocked to find out Jayda had made the moss letters herself because they looked store purchased, moreover, that they were incredibly easy to make. After her blessing, I was excited to take my own twist on her idea. While writing this post, I did a quick Google search and found a wonderful DIY at Catch my Party, in which Jillian has almost the exact same instructions as this post, however with a few handy deviations. Additionally, she has awesome step-by-step images throughout the tutorial! If you’re a visual person, I would highly recommending checking out her DIY.
Project Level: Easy
Time Commitment: Approximately 1 hour total for two letters and one ampersand. (As long as you don’t mess up like I did: See Step 3)
Cost: Approximately $50 prior to any sales.
Items:
- Paper Mache Letters: 23.5” : $10
- Cardboard Ampersand: 12” $5.50
- Hot Glue Gun:$5
- Glue Sticks :$3.50
- Moss Mat:$17
- Hemp Cord: $8
Steps:
- Plug in the glue gun. I didn’t previously own one so I bought the cheapest one I could find and it worked perfectly fine.
- Plan. Plan. Plan. As I often do with projects, I rush into them and then have to troubleshoot the most effective way out of the craft based predicament I find myself in. With this project I started on the right path by laying out the moss mat and overlaying the Paper Mache letters to find the most efficient application for the moss. One mat was sufficient for both letters and the ampersand. Based on the size of the large letters cut the moss mat in half.
- Start with one of the large letters and half of the mat. Beginning at the top of the letter, apply hot glue to the flat surface for approximately an inch or two. Immediately apply the moss mat to the top of the letter (moss side up), double checking that the letter surface will be completely covered by the moss. Prior to this step, please take note and learn from a significant mistake that I made and double, no make that triple check that you have your letter facing the correct way. I lost over an hour of work by rushing along and completely finishing before a realizing my ‘S’ was backward. The moss is fairly durable so I was able to peel and tear off the moss and piecemeal it back together on the correct side, however it was a frustrating and tedious process.
- After waiting several minutes, lift up the free section of the mat and add glue to the next few inches of surface, starting where the moss was adhered to the surface of the letter in Step 3. Repeat section by section, allowing the glue to cool in between until the surface of the letter is completely adhered by moss.
- Once the glue has sufficiently cooled, trim the excess moss from the edges and set to the side for later use.
- When covering the sides of the letter in moss, you will be using the excess moss trimmed from Step 5. This step is very similar to piecing a puzzle together, as you will be trimming and gluing random pieces of moss one at a time to form a uniform carpet. Hopefully, the pieces come together in the most efficient way possible in order to hide the many seams found between pieces. If a seam is obvious or apparent, cut a sliver of moss off and glue in place over the seam. From a distance it look like one uniform piece. This step is time consuming but the overall effect on the monogram will be evident almost immediately.
- Repeat with the second letter and piece of moss mat left over from Step 2. Continue collecting any excess pieces of mat.
- With only the ampersand remaining, there should be enough excess pieces of mat to piecemeal over the top surface and sides of the symbol. This could be dependent on the letters you used, for example, I would assume a ‘B’ would take up more of the moss mat than the ‘L’, I used, perhaps leaving you with insufficient excess to cover the third symbol. If that is the case you will more than likely need to purchase a second moss mat.
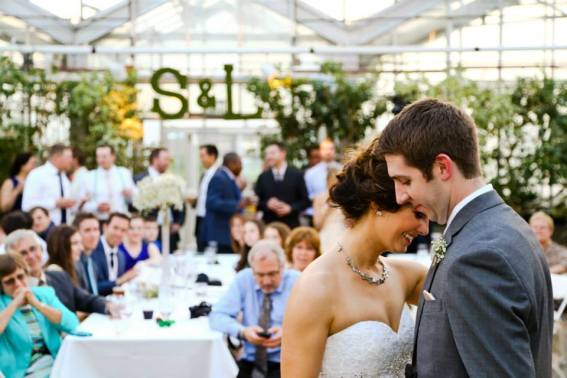
Overall, this was a fun and relatively easy project that served as a beautiful focal point for our greenhouse reception. My good friend Kari came up with the idea to hang them above the entranceway, as such I would have probably covered both sides with moss, but they turned out wonderful regardless.

I love this! Thank you for sharing
LikeLiked by 1 person
Thank you Alecia! I’m happy you enjoyed the post!
LikeLike
Such a cute idea! I should have done this for my wedding!
http://www.thisfpplanet.com
LikeLiked by 1 person
Hello Michaela! Thank you! I’m glad you enjoyed my crafty post!
LikeLike
How cute!! What a great idea! And you’re right, that doesn’t sound too hard…
LikeLiked by 1 person
Aw! Thanks Christy! It really was surprisingly easy as long as you have the letters facing the correct way! 😉
LikeLiked by 1 person
Yes, those little things do make a difference 😋
LikeLiked by 1 person
Love this, very unique!
LikeLiked by 1 person
Aw! Thank you Sharon!
LikeLiked by 1 person
Reblogged this on Ancien Hippie.
LikeLike
Cool!
LikeLiked by 1 person
Thank you Lisa!!
LikeLiked by 1 person
That’s kind of a cool idea and it does sound easy 🙂
LikeLiked by 1 person
Thank you! It was definitely easy and a great decoration. I have them hanging in our sunroom now.
LikeLiked by 1 person
Moss covered letters sound interesting!
Must try them out. Thanks for the tutorial! 🙂
LikeLiked by 1 person
Thanks! Let me know how your project goes! 😀
LikeLiked by 1 person
Definitely! 🙂
LikeLiked by 1 person
Excited to try this for my best friends bridal shower 🙂
LikeLiked by 1 person
Oh please let me know how this works out!
LikeLiked by 1 person