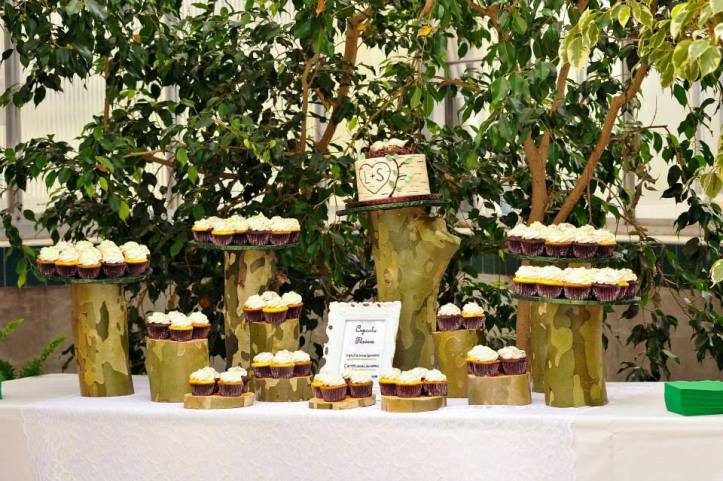
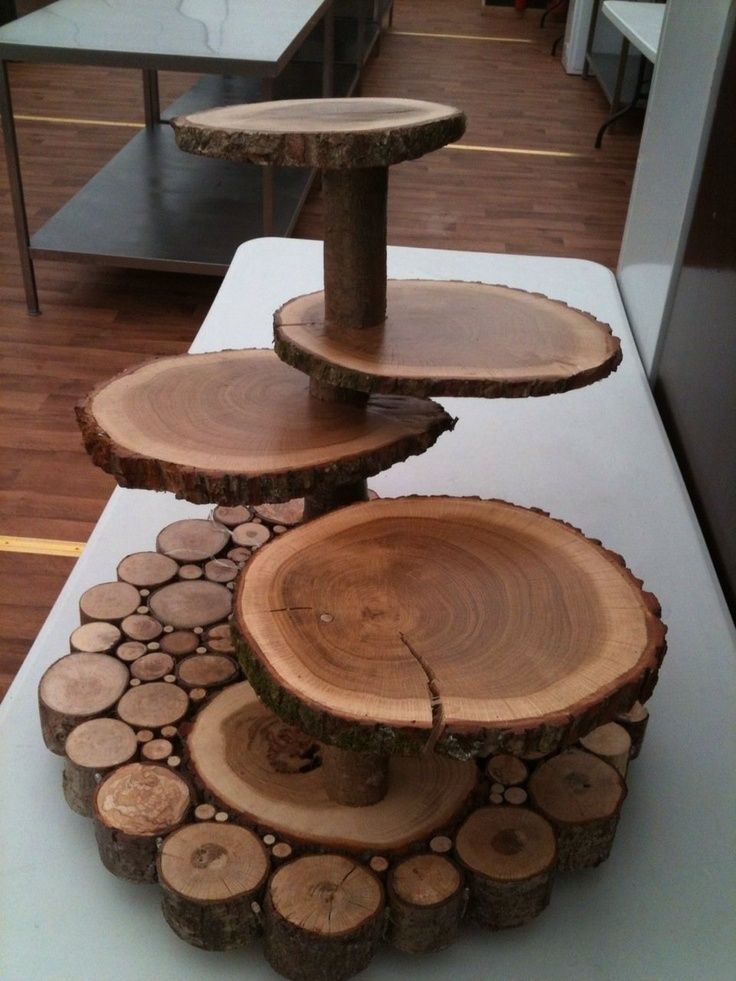
One of the favorite details I was able to obsess over during wedding planning was the cake table. There are so many creative people with wonderful, unique ideas for the cake and subsequent table layout that I spent more time than I care to admit perusing Pinterest for ideas. Once I had a general idea of what I was looking for, the key was then to transform that model into a cost effective, unique concept for our own wedding. We knew, based on cost that we were going with cupcakes and a little personal cutting cake, all made by one of my best friend’s Mom, Cheryl, but how to display our desserts in a cost savvy, yet unique manner that Luke and my Dad could make with minimal frustrations. The final product was a result of my stubbornness, my Grandma’s practicalness, my Mom’s spark of ingenious, and Luke and Dad wielding the chainsaw. My initial ideas involved tiered wood slices supported in the middle by a log/branch, e.g. Example 1, Example 2, Example 3, however we needed to fit at over 200 cupcakes plus our cutting cake on and around this structure. It seemed like overkill to put the effort into making the wooden stand and only be able to fit a small fraction of the cupcakes on the base. My Mom and Grandma came up with the idea of cutting logs, and adhering circular plywood pieces for a platform. Some of my Grandpa’s farm land had recently been logged, as such my Mom suggested we meander through the woods to see if any of the felled logs left behind would fit into the image that I was very stubbornly holding on to. The events that transpired involved Luke, Mom, Dad and I crawling over and under many logs before we found the perfect sycamore branches that had been left behind, followed by creating a bucket brigade to efficiently pass the logs out of the woods. The whole ordeal will always be a fond memory of mine, and a reminder as to the extent my family is enabling and supportive of my sometime ridiculous projects.

Project Level: Medium/Hard (Easy if you know how to wield a chainsaw)
Time Commitment: After finding your perfect wood slices; 30 minutes
Cost: $22
Items:
- Chainsaw
- Logs of varying height (2” to 18”)
- Scotch Tape
- Embossed Florist Foil: $18
- Matte Clear Spray: $4
- Plywood Circles (10” diameter): $15
Steps:
- Collect the quantity of wood slices and logs of varying heights as is appropriate for your cake table. Pretty much any wood type would be appropriate, it just depends on the overall look you are going for. Personally I chose sycamore logs, and after cutting them to size, they were allowed to sit for almost a week to allow the draining of any sap.
- The mottled bark of the sycamore logs easily become marred, bruised or scratched with even the slightest bump so it was decided to coat the logs in several coats of clear matte paint. It not only served to protect the delicate bark, but also stop any sap, etc. leftover from leaking on the lace and tablecloth.
- From the plywood, cut enough 10″ diameter circles as needed to cover the quantity of logs.
- Make sure the base of the logs are stable. You can just image a nightmare in which the logs topple over domino style while loaded with all of your delicious wedding treats. To stabilize, the edges of the logs might need to be sanded down or new pieces sawed off. This is one of the key aspects during the project in which you can creatively play with angles and create a safe tilting effect.
- After you’re satisfied with the sturdiness of your log bases, adhere the plywood circles to the top of the wooden logs using one or two screws.
- Cut out 16″ circles of foil, lay flat on the top of the plywood circles (shiny side up) and begin to tape excess edges to the bottom of the plywood. Make sure to smooth out any wrinkles as you work your way around the circle.
- For the highest log base (math pun!) that will be holding the cutting cake, perhaps add another plywood circle to the bottom of the base. This piece of plywood should already wrapped in foil, with the log being placed on top of the smooth foil surface, which is facing up.
- The random, smaller wood slices can be arranged throughout your table to hold approximately 4 cupcakes each.
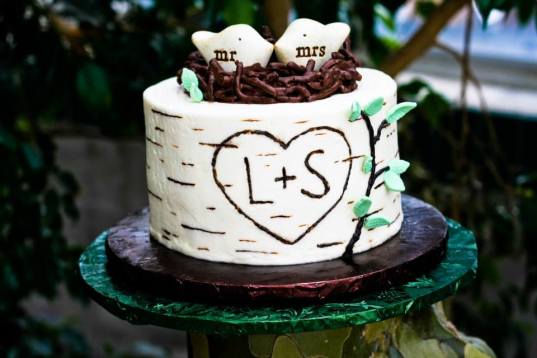
Also, please allow me a moment to send a shout out to Cheryl, who went above and beyond my wildest expectations for our beautiful cutting cake! Didn’t she do an amazing job?

What a cute idea!
LikeLiked by 1 person
Thank you Tanja! It turned out better than I could have imagined!
LikeLike
This is sooo pretty 😍
LikeLiked by 1 person
Thank you! Thank you!
LikeLiked by 1 person
Very creative. I love the results!
LikeLiked by 1 person
Thank you! My Mom and Grandma get all the credit!
LikeLike
Lovely, original idea! Please feel free to send me any leftover cupcakes… 😉
LikeLiked by 1 person
Cupcakes are the best! I wish I could have had an extra one too!
LikeLiked by 1 person
Absolutely beautiful ❤ We, too, had cupcakes to cut cost and create less mess in our outdoor wedding 😉
LikeLiked by 1 person
Thank you! Thank you! Plus cupcakes are the best anyway!
LikeLiked by 1 person
Mmmmmm……cupcakes……
LikeLiked by 1 person
This is a lovely idea! 🙂
LikeLiked by 1 person
Thank you! It turned out so much better than I had hoped for!
LikeLiked by 1 person
[…] via DIY-Wooden Wedding Cake Stands — The Critiquing Chemist […]
LikeLiked by 1 person
[…] Wooden Wedding Cake Stands […]
LikeLike